Today we will have a quick whizz at a DIY cushion - the "Birds" cushion.
In the last 2 posts, I talked about how to make a Kenbo-san cushion and then how to make a cousin Gustave cushion. Today we will go into a more traditionally shaped cushion - the Square! But I wanted something that was more in keeping with Kenbo and Gustave than just the run of the mill cushion. And I really wanted a cushion cover - that can be removed, changed, washed. (Kenbo & Gustave will have to face the dry cleaners at some stage in the future.)
I already had a cushion (inner) to start off with so I just needed to get the right measurements. Then choose fabric and cut out the size for the cushion.
Note that as this is intended to be a removable cover, you will have to think of making allowances for the opening.
The back is done separately so this photo here only shows the front.
Layout the various mix media you need to "draw" out the picture. Experiment till happy.
TIP:
very useful to take a photo at this stage for later layout referencing.
For the back I elected to go with a button down closing about half way down the back .
And I decided to have a complementary but different color and fabric for the back.
Th back will have to be made of 2 pieces that together forms the same measurement as the front. The picture here tells the story so I don't need to verbiage more on this. (click to view larger images)
Get all that done, ensure sizing is correct and we can go back to the fun front part of the cushion.
Using your photo/drawing of the layout (see TIP above), place, pin and tack down the various pieces. Long running stitches will do. (To be removed later).

Once all your (fabric) elements have been tacked down in place, start to properly sew down all the edges to the cushion front piece. You can use whatever embroidery stitches that will yield a strong stitch as well as add to the look you want.
TIP: the thread color and size as well as the type of embroidery stitch you choose to employ can all make a difference in the outcome. Experimenting is fun!
Once everything is done, sew/glue on your other pieces of mix media. Remove all tacking thread. Place front and back pieces, right sides (RS) together and sew together. Turn RS out and your cushion is ready to join the family!

FYI: Some more references on how to make cushions.
The End of my diy BIRDS cushion. Will there be more coming? I'll have to consult the eclectic cushiony family ....
 |
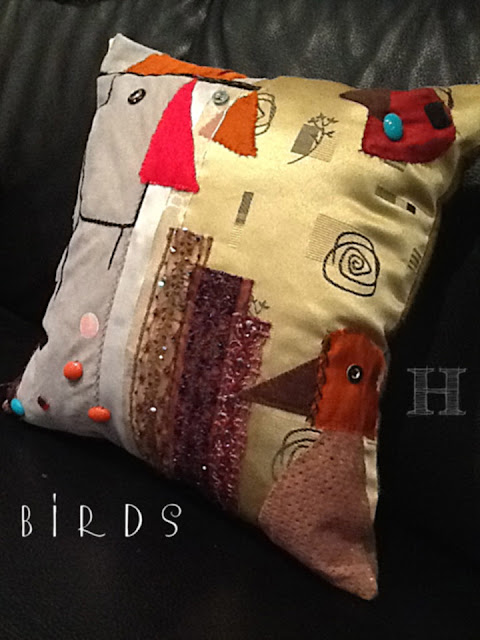
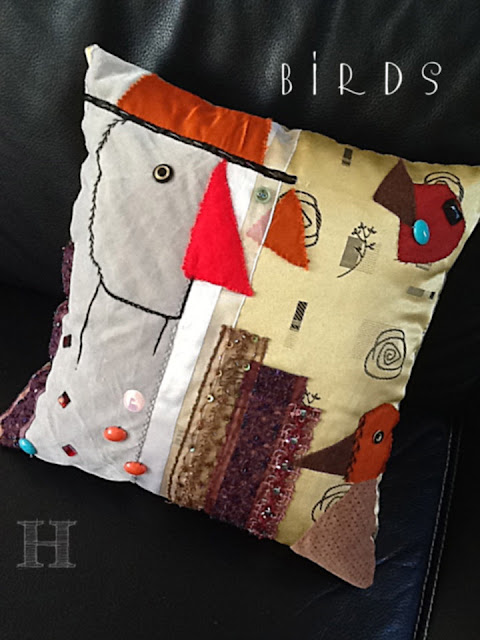
| "Birds" cushion (CH0304) |
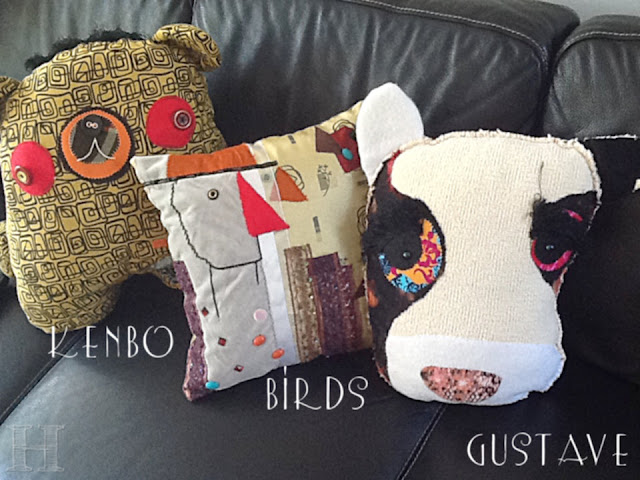
So lets have a peek at how the quirky family looks together ...
 |
| Eclectically Happy Family of Hand-made Cushions |
Instead of referring to the scary Hitchcock's The Birds, I went looking for seeds of inspiration from more contemporary and eclectic sources. I found it in Henryk Syydlowski's art - a funky genius. Now I just had to translate that into the cushion cover I wanted ..
Note: Strictly speaking, I am not making a cushion here as much as I am making a cushion cover. However to be in keeping with the growing family of cushions sneaking into our home, I will continue to refer to this as the Bird cushion.
 |
| The start of Birds cushion |
I already had a cushion (inner) to start off with so I just needed to get the right measurements. Then choose fabric and cut out the size for the cushion.
Note that as this is intended to be a removable cover, you will have to think of making allowances for the opening.
The back is done separately so this photo here only shows the front.
Layout the various mix media you need to "draw" out the picture. Experiment till happy.
TIP:
very useful to take a photo at this stage for later layout referencing.
 |
| Back of cushion |
And I decided to have a complementary but different color and fabric for the back.
Th back will have to be made of 2 pieces that together forms the same measurement as the front. The picture here tells the story so I don't need to verbiage more on this. (click to view larger images)
Get all that done, ensure sizing is correct and we can go back to the fun front part of the cushion.
Using your photo/drawing of the layout (see TIP above), place, pin and tack down the various pieces. Long running stitches will do. (To be removed later).

Once all your (fabric) elements have been tacked down in place, start to properly sew down all the edges to the cushion front piece. You can use whatever embroidery stitches that will yield a strong stitch as well as add to the look you want.
TIP: the thread color and size as well as the type of embroidery stitch you choose to employ can all make a difference in the outcome. Experimenting is fun!
Once everything is done, sew/glue on your other pieces of mix media. Remove all tacking thread. Place front and back pieces, right sides (RS) together and sew together. Turn RS out and your cushion is ready to join the family!
 |
| Birds cushion joins the family |

The End of my diy BIRDS cushion. Will there be more coming? I'll have to consult the eclectic cushiony family ....


