Crocheted Beaded Weighted Blanket
I first heard of weighted blankets in May 2019. It is now Nov 2019. And I have started a big project to make a beaded weighted blanket – double sided. However as it is taking so long and I have been diverted to other projects so often, I think I better start documenting what I can before I forget what it is I am doing!!!

Addendum (Apr 2024):
This will remain an incomplete project.
Prelim Info for Weighted Blanket Size-to-Weight
These are prelim info I looked into for this project.
Beaded Crochet Blanket - Side 1/Apollo Bay
I drew a rough draft >> Inkscape to vectorise & colour >> export a full colour copy and a semi-transparent copy >> imported semi-transparent into LibreOffice (with grids set to beaded crochet sizing)
I have made pink-lined rectangles in the spreadsheet that will correspond to Side2 of the blanket. Each of this rectangles will be crocheted separately and joined together – so that they are double sided. Then these double sided rectangles are joined piece by piece to make up the full blanket.
There are 44 pieces per side – so a total of 88 pieces to be made.
Beaded Crochet Blanket - Side2 / Abstract Floral (Scandinavian)
 I got the original royalty free image from Pinterest. It is actually from Shutterstock.com
original image for idea >> modified and horizontally flipped >> Inscape for testing vectorising, colours, and numbering (work sequence) >> import into LibreOffice spreadsheet for beaded crochet graphing
Colours Inspiration
I used Helen Dardik’s (from Orange You Lucky) joyful work for colour inspiration.
Materials
- yarn: bamboo blend (70% bamboo, 30% cotton) from OzYarn
- hook:
2.5mm2 mm - beads: 8/0 (Miyuki, Toho, other)
I used a large proportion of Chinese 8/0 seedbeads. Yes they are uneven but it does not matter in this project. In fact they give it a texture-look that the perfection of Japanese beads cannot. And anyway … I have SO much of the Chinese seedbeads and this is the perfect project to use them up. 😀 - Bamboo yarn below: not the most fun yarn to work with (not the worst either!) because the strands tend to separate easily which means the hook gets caught easily IN the yarn rather than around the yarn. However this is a suitable yarn for this project because:
a) it is very, very strong … which is what you want for a high-use, heavy project of this kind
b) it is the right diameter for stringing on the 8/0 seedbeads
TIPS BEFORE STARTING
- Stringing on beads: remember to work downwards; e.g. from R10 to R1.
Additional instructions are on graphed project (weighted blanket.ods in LibreOffice) - Stringing beads: string/add a disposable marker (e.g. plastic sequin) at the end of each row. Will help to keep track of beads when crocheting. Cut off when you reach it during work.
- Cast on with MM cast on. Cast on (number of stitches per rect. section + 1st, for selvedge edge)
- when crocheting, all odd rows are WS (i.e. beads are face away from you)
- to get straight side edges, for every row, work beg and end st like you would for Thermal Stitch – viz. skip 1st at start and work 1st extra (from side st) at end
- start each row with a standing ch
- for each side, for each rectangular section, end with the beaded row; not a blank (seam) row
- for each side, sc all round to finish off each section (makes joining easier). There are 2 ch at ever corner. Hook: 2/0. sc along horizontal: 5sc, 2sc tog, rpt. Vertical (rows); 3sc, 2sc tog, rpt.
- when joining each Side 1’s section to corresponding Side 2’s section, use latch hook to work “chaining” (slip st through both pieces) to join
- Join the double sided sections to form blanket as each double sided section is completed.
How To Join Pieces
I used a medium size latch hook to do the joining – making simple chain slip stitches. You can also use a crochet hook to do this.
First, join corresponding sections from Side 1 to Side 2. You might want to pin/clip sections together and ease sections together. Don’t worry that the pieces are not totally flat when done – just work in the easing as best you can.
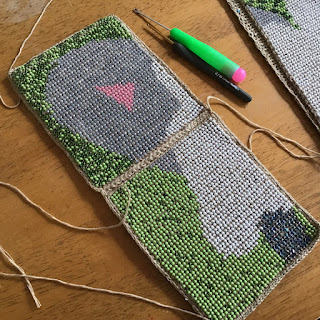
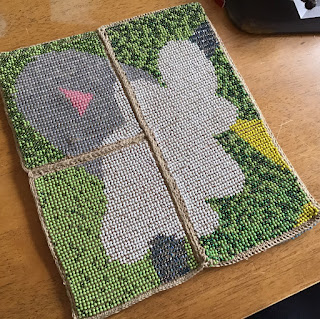
Crocheted Beaded Weighted Blanket CH0537 – WIP Photos
Beaded Weighted Blanket As It Comes Together…
Remember that the sections of sides 1 & 2 pieces, are already joined.
Side 1
Side 2
Personal Notes: HD File/Images Storage

• I have stored all the needed files and WIP documentation on
GALLERY > HOME DECOR-GALLERY > CH0537_Pattn_WeightedBlanket_Incomplete


