Wassily01 Jacket – the colours and illustration on this jacket are my abstractions from some of Wassily Kandinsky’s fabulous abstract art. Hence the name.
The shape was inspired by the easy, casual, and comfy Japanese-style boxy jackets. It is generally free sizing, which is very convenient.

I made this using LC2C (Linked C2C). LC2C is like C2C (Corner to Corner) crochet – except I like my LC2C so much better. Why? Because it produces a nice, dense, drapable, cushy fabric. The standard C2C crochet produces too many large holes in the fabric and worse, the holes keep getting larger with use!!
You can find out how to crochet LC2C in my photo tutorial.


Where to Buy This Pattern
• Wassily01 Jacket pattern on RavelryBasic Info
This pattern is made of 8 separate pieces, worked in LC2C. The Front has 2 identical panels. The Back has 2 identical panels. The 2 Sleeves are identical. And there are 2 pieces for the Pockets. (My graphed pattern is made up of 4 separate graph pieces: front, back, sleeves, pockets).


NOTE: You might notice that the final size does not fully correspond to the planned size, as per illustration. That is because,
• the gauge is only a (good) guideline. I have yet to produce an exact output-measurements based on Gauge-calculations.
• also the illustrations did not include the sleeve bands which I added separately.
Materials & Specifications
| Size: |  Free Size (as per photo)
(Note: It is designated as “Free Size” which normally means will fit sizes Sm to Large or approximately (Aust) Size 8-14) |
|---|---|
| Crochet Terminology: | American & Crochet Symbols |
| Yarn: | mainly Stylecraft DK Special (Painbox Simply DK, & misc. ) |
| Manufacturer's Recommended Needle/Hook Size: | 4mm |
| Number of Colours: | 19 |
| Hooks Used: | 3mm (note: smaller than the yarn’s recommended size), 3.5mm & 4mm (for bands around sleeves, front & neck) |
| Crochet Technique/Stitch: | No-Hole C2C (aka, holeless C2C, or Linked Corner to Corner) |
| Graph sizes (in squares): | (please refer to graphs in pattern) |
| Final Size: | Free Size (as noted above) |
| Final Nett Wt (approx.): | 0.9kg |
| Work Time (approx.; excl. prep & graphing): | 18days / 144 hours |
(Approx.) Gauge
[10×10 sq] = [16×16 cm ]or
[10×10 cm] = [6.25 sq]
Wassily01 Jacket - Initial Ideas

The behind scenes work can be quite lengthy and tedious, with no clear path to trod. I am unable to capture all the meanderings and the long hours of playing with visuals, vectorising, graphing, colouring, and counting – but this highly summarised image below highlights some of the original, underlying thoughts I had when I was designing this jacket.
WIP Steps & Photos


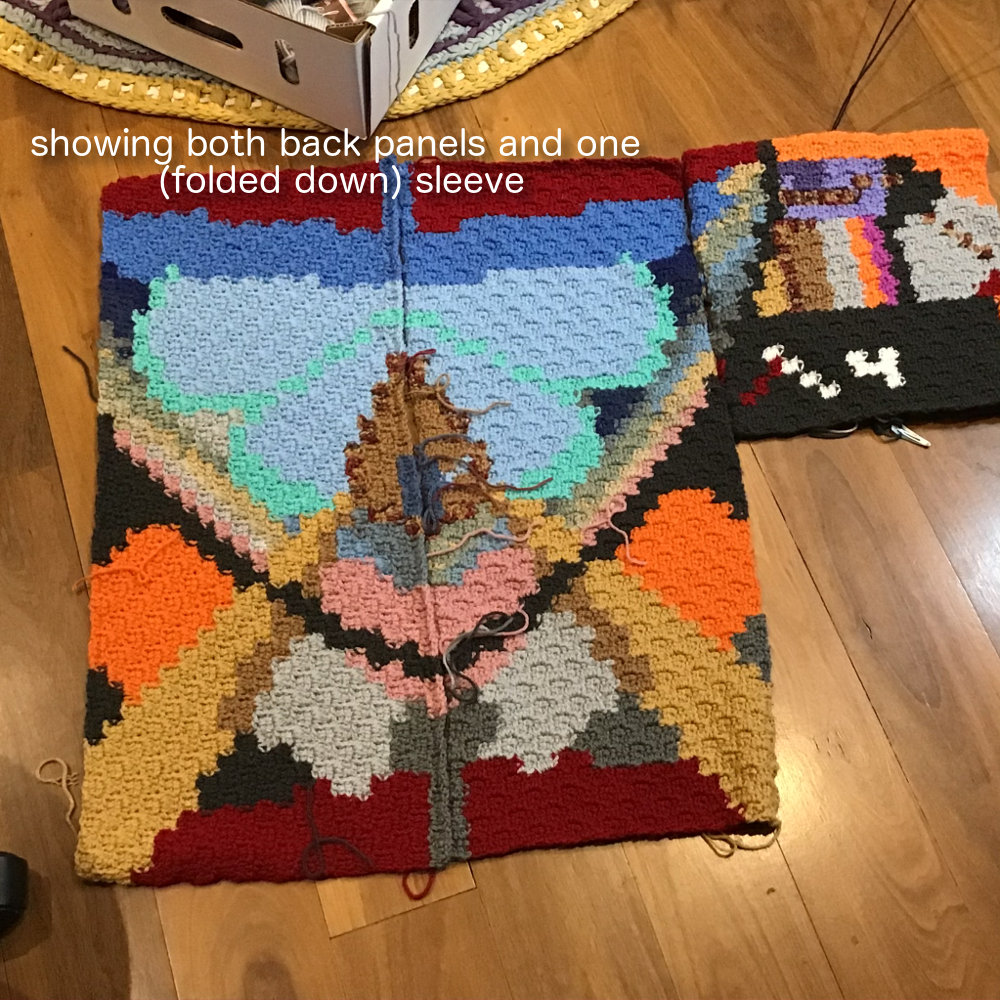


Once all the 6 pieces are complete, we will join the pieces. But before joining, I usually neaten all the edges. This makes it much easier to join pieces together and gives a much neater join.
(Here, I didn’t follow this recommended sequence. That is because I only decided to have pockets after the garment pieces were put together.)
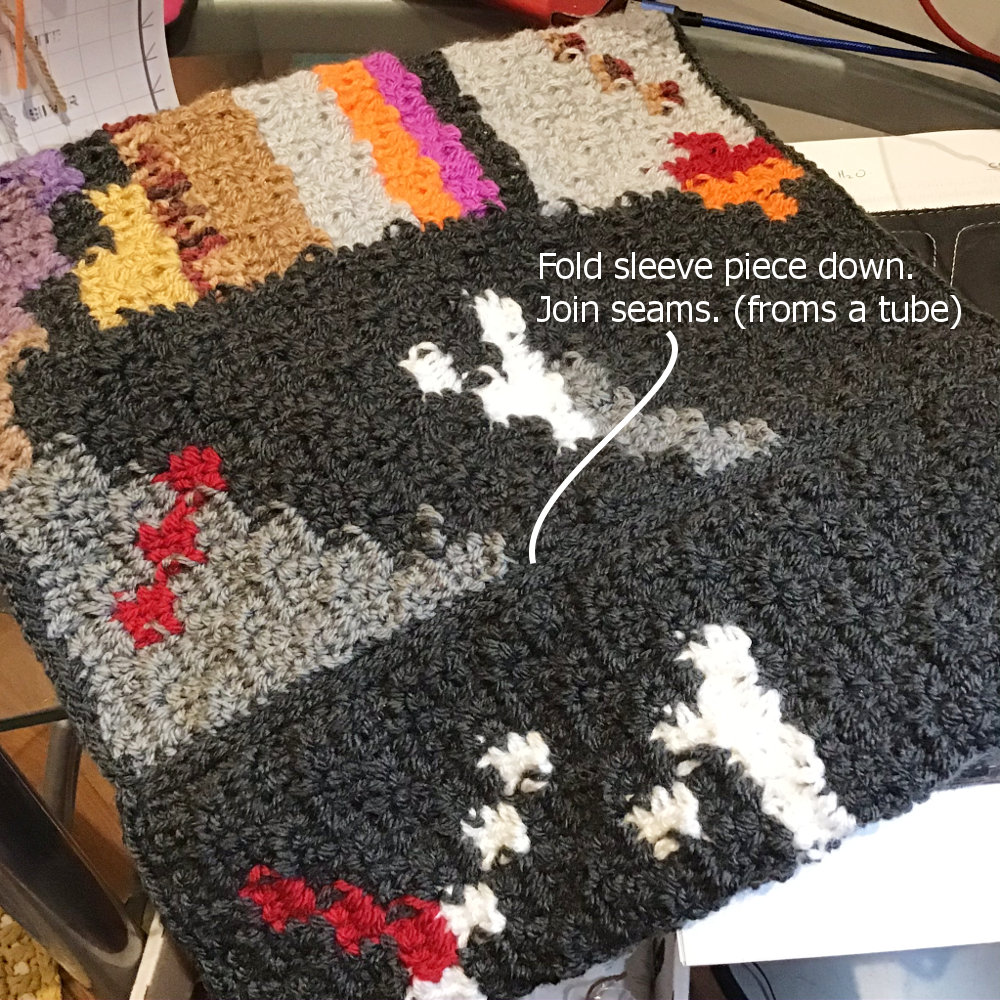
Neaten Pieces & Join Together
First I neatened with sc row around all pieces, then I joined.
(Tip: don’t join sleeves to body yet if making banding for sleeves. Join sleeves after banding has been made. Easier that way.)
• Raised Chains Crochet Join – the crochet join I used here. You can use your own preferred method of joining.


Sleeve Bands (optional)
You can end off the edging on the sleeve in whichever way you like. You can also choose to have a thick sleeve band (in any method/design), or none at all. The look and length will be up to you.
Here I will just document what I did. For the bands, I employed Overlay Mosaic Crochet method.


NOTES:
• I used a larger hook for the sleeve band because the C2C crochet stitch (and even the LC2C crochet stitch) produces a comparatively looser fabric. The Mosaic Crochet stitch yields a firmer fabric.
Front & Neck Bands
 This band should be around 4cm in width. You can choose to make a band in whatever crochet stitch you like.
Here, again I chose to do it in Overlay Mosaic Crochet because that will give me a fairly firm band. And also gives me a chance to try out another patterned design from the pattern collection in Barbara Walker’s Mosaic Knitting book.
For the Front & Neck Banding, I used:
• 2 different hook sizes
• 2 different yarn wts
• Mosaic Knitting/Crochet pattern; again from Barbara Walter’s book shown above
The Mosaic Crochet pattern I chose was in part determined by the number of stitches I picked up around the front and neck. More on this below …


Finishing the Bottom Edge (optional)
Okay, this is definitely optional. I am just a bit pedantic when it comes to finishing!


Pockets (x2) - Neatening & Attaching
Obviously the pockets are optional. Not everyone loves pockets. I do. So I have added 2 pockets with slanted top edges. The pockets are also worked in LC2C. If you are working in C2C, then continue by working the pockets in C2C. (Graphs for pockets are also provided in the pattern).

Please refer to how to get a straight, diagonal edge in LC2C or C2C crochet work.
The photos below continue in the assumption that you have already made the pockets (from the pattern’s graph) and with straight diagonal edges, as per how-to link above. The photos show how I neaten the edges and how the pockets are, as invisibly as possible, attached to the garment.


Wassily01 Japanese Boxy-Style Jacket – Finished!


Pattern Now Available
Please note that the pattern is not a tutorial. The listed pattern will consist of:
- C2C graphs, with diagonal lines and colour count indicators (at 300-600dpi; suitable for print outs)
- written colour count for C2C work
- explanatory notes for how to best use the graphs and written colour count
- useful links to other optional how-tos & tutorials if you want them
Where to Buy This Pattern
• Wassily01 Jacket pattern on RavelryUseful Links to Tutorials Mentioned Here
- How to crochet LC2C (Linked C2C, aka No-Hole C2C) – my photo tutorial
- Raised-Chains Crochet Join Tutorial – crochet join method employed here to join pieces together
- Overlay Mosaic Crochet Tutorial – method used to crochet the sleeve bands, and around the front & neck
- How to get Slanted, Straight Diagonal Edge in LC2C & C2C – needed to make a straight, top edge for pockets here