Basic St Petersburg Stitch
Note:
This article has been updated to Beading: St Petersburg Stitch (recommended).
This article has been updated to Beading: St Petersburg Stitch (recommended).
St Petersburg stitch is something that I learnt before and then promptly forgot, much to my chargrin. So this time, I have drawn up a simple pictorial.
 |
| Basic St Petersburg Stitch - How To |
Once you get the basic St Petersburg stitch, then the variations you can ply on them will be pretty endless.
Samples of St Petersburg Stitch and variations
As the variations that one can try is quite endless, I will only be showing a small sampling as basic possibilities.This photo is of a basic St Petersburg Stitch. I have used large beads here (4mm) just so that it is all easier to see.
Curving St Petersburg Stitch I
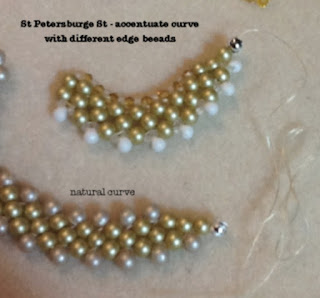
Using different (shapes or size) of the edge beads will also produce interesting results.
Curving St Petersburg Stitch II
I find that the St Petersburg Stitch has a "yearning" to curve - so this is one advantage that can be made use of.
The bottom sample shows the basic St Petersburg stitch - it has a natural (tendency to) curve.
The upper sample is made with different beads to accentuate this natural curve.
The outer curve has (seed bead + drop bead + seed bead) as its edge bead.
The inner curve has one smaller (3mm) bicone.
To firm up the piece, thread along the inner curve. Here I have added a seed bead between each of the 3mm bicone.
The below Ms Seaside Squiggle earrings (CH0192) shows the use of St Petersburg Stitch.
 |
| Ms Seaside Squiggle earrings using St Petersburg Stitch |
 Now I shall go back to playing with other beading & wirework techniques but this basics in St Petersburg Stitch should be sufficient as a memory jogger for me when I need to refresh my memory. Hope you enjoyed this as well!


