I think I hardly need say that this neck warmer-gloves set was specially made, with lots of kisses and hugs, for a very special lady: Kerrie Slade. (Kerrie Slade is the famously talented creator/owner/designer of Kerrie Slade – Contemporary Beadworks.)
As per request, it is created predominantly and virtually exclusively, in the deep, soothing richness of Olive Green.

The neck warmer and fingerless gloves set is made with 2 detachable (magnetic flowers). A scattering of the deep, royal Purple Velvet Swarovski crystals on one of the flowers gives a subtle and enchanting flash of bling. Perhaps for a romantic assignation along the leafy greens of an autumnal walk? 😉
Neck Warmer – Different Looks, Different Styles
I have crocheted the neck warmer to give it a scalloped (top) edging and a romantic, longer pointed (triangular) edging (bottom). Of course there is no fixed rule to this.
There are 2 buttons for closure. Not both buttons have to be used simultaneously. So it can be worn snug or a bit looser, or even with the top edging folded down to give it a “collar” effect.
Note especially that the top loop can also be used on the bottom button of the other side, producing a funky asymmetrical look. The photos below will give some indications of the different wearing styles possible.
Neck Warmer – Worn Asymmetrically


Neck Warmer – Folded down for Collar effect


Neck Warmer – Cosy; Buttoned Up!


Neck Warmer – The Other Flower
There are two interchangeable flowers. The two flowers for this crochet neck warmer are detachable via the use of magnetic clasps. Here is the other flower. All green till you have a closer look. Leaves have a subtle shade of difference in hue. 🙂


Neck Warmer with Detachable Flowers


The detachable flowers are easily interchanged with the use of strong magnetic buttons.
The Full Set: Crocheted Neck Warmer and Fingerless Gloves

The Crocheted Fingerless Gloves


Behind the Scenes – the making of Crochet Neck Warmer and Fingerless Gloves
This below will be snapshots of in progress work with some commentary thrown in.
• 40% acrylic; 60% cotton
• 4mm crochet hook

RO: With 4mm hook, start with 45 sts => 29cm
R1: Sl st (slip stitch) into “backbone” of chain stitch. This will form what looks like 2 parallel rows of chain stitch, back to back.

R2: dc (double crochet) into each side of the “double” chain stitch foundation row. 7dc into each end stitch for rounding

Once that is done, it is time to determine how it will fit around to the desired round-the-neck length you are aiming for. While doing this, you can determine the placement of closure buttons and also where you might want the loops to be.

Making the Flower Decorations
To provide more than one look and a splash of colour, I decided to create a couple of detachable flowers for the neck warmer.
I got instructions and inspirations mainly from Pinterest.
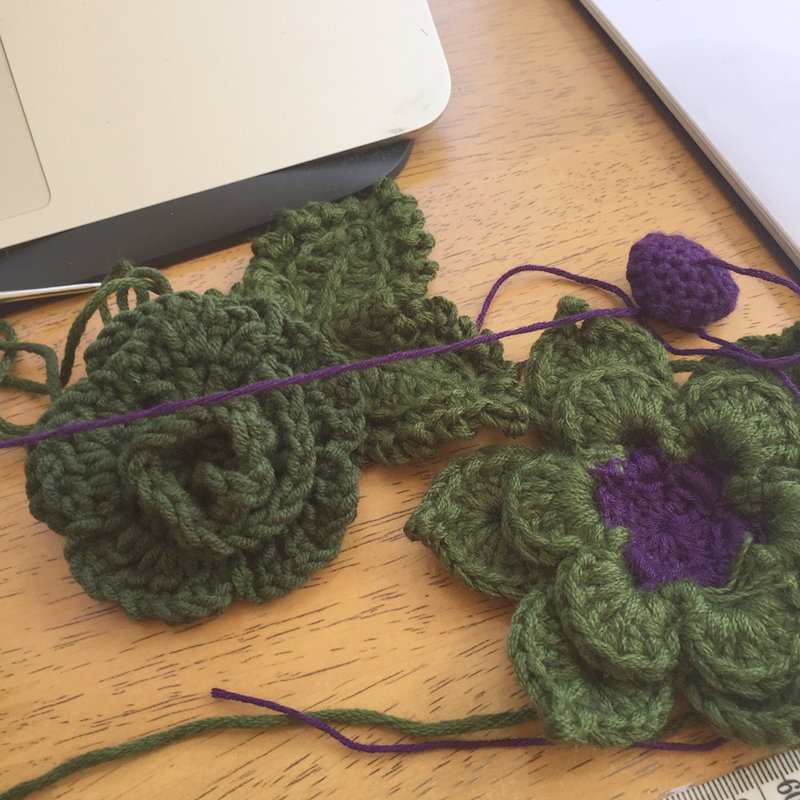


I had to add some beloved Swarovski sparkly crystals (in Purple Velvet) to add the delicious sparkle I love so much.
Neck Warmer: Closures and Finishing Flower Attachments
I wanted to have a (ahem) professional finish to the magnetic attachments for the detachable flowers. But still strong and firm enough not to be flimsy.
To create the “professional” look, I decided to crochet a round base which would cover the felt circle I was going to use. The felt circle was to provide a firm base through which the prongs of the strong magnetic buttons would go.


Remember that the “male” side of the magnetic button will be at the bottom of each flower. While I haven’t got a photo for this next step, you mark where you will cut 2 small slits on the felt backing, where the prongs of the magnetic button will come through.
You then push the prongs of the magnetic button through the crocheted circle, through the slits in the felt backing, and fold down the prongs of the magnetic button securely and flat.


The “female” side of the magnetic button will sit on top (in front) of the neck warmer piece. It should end up looking like this:

Push through the magnetic button from the top (right side) of the neckwarmer, then through the felt backing, and flatten down the prongs. Cover with the piece of crochet circle, sew down invisibly.


Fingerless Gloves

The fingerless gloves is made in two parts – top (where the “leafy” look is) and the bottom (covering the hand and part of the fingers).
The “leafy” part is actually a stitch called Crocodile Stitch. In this instance, especially given the colour of the piece, I thought it would give a “leafy” look, which is what I wanted. I also wanted this stitch because it would provide more warmth. And I could well imagine a lovely girl like Kerrie, romping through the cool of winter (or autumn), flicking up the leaves on the floors of a forest and appearing like a forest nymph!


Once the top part of the gloves is done, then I just completed the rest of the gloves to cover the hands and part of the fingers.