
I will try to give some detailed steps into the making of these crochet baby shoes. While not a full-blown tutorial, I hope it will still serve you in making your own and giving you ideas for your own dazzling creativity.
Baby Shoes #1
This pair below was the very first baby shoes I ever made. I thought it would take me an hour but instead, it took the whole of the night (Christmas Eve) to make it. But it was worth it. There is a new baby coming soon into the world - Pete's nephew, and I thought it would be a good thing to wish the new to-be-born bubba a Merry Christmas while she was still a-coming into the world.


Baby Shoes #2
Once I have (sort of) learnt something, I always find it much easier to remember or refresh my memory via written instructions rather than watching a video. So for that reason, I have written out the steps to the following crochet Baby Shoes #2 (below).
How to Make Crochet Baby Shoes
The yarn you use will determine the crochet hook size and the number of stitches you will need. I have included the materials I used here and the specific number of stitches and beads here just to give a clearer guide. But remember you may need to adjust if your yarn size is different.Size The final foot length for the shown shoes is about 7-8 cm. (Suitable for premmies)
Materials
- fine yarn (70% bamboo, 30% cotton)
- 134x Miyuki short drop beads (Transparent Clear AB)
- 88x Miyuki short drop beads (Opaque White)
- 88x Miyuki long drops beads (Frosted Pink)
- 22x Swarovski Crystal Pearls 4mm (col: Rosaline)
- 2/0 (2mm) crochet hook
Stringing Beads Having beads is optional. If you are going to have a beaded crochet baby shoes, then there are some things to keep in mind.
String beads before commencing with the crochet.
Here I am showing the back of the baby shoes. You can see that I have used 3 different types of beads. When you have different beads (be they colours or shapes or size) then the sequence of stringing the beads becomes important.
When looking at the finished item, the beads have to be strung from top to bottom.
When looking at the finished item, the beads have to be strung from top to bottom.

When you look carefully at this photo, you can see that there is a half-band of clear drops. And one half-circle of Swarovski pearls at the front. These have to strung first.
Followed by a full row of clear drops, then opaque white drops, then frosted pink (in the long drops).
These are shown in the photos below (per side) …
Followed by a full row of clear drops, then opaque white drops, then frosted pink (in the long drops).
These are shown in the photos below (per side) …

Stringing Sequence
23 beads – This will be for the back, top half-band.

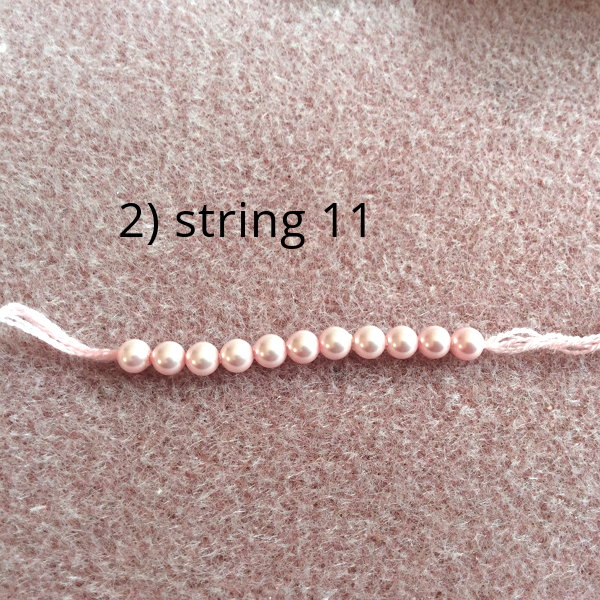
11 pearls – This will be for the front, half-circle.
44 beads – This is for the bottom, all round row.

44 of each bead, in the sequence shown. See the beads on needle for more clarity.
This is for the bottom row. The beads here will be worked in dc (double crochet) – 2 beads per dc.
This is for the bottom row. The beads here will be worked in dc (double crochet) – 2 beads per dc.

Let's Start Crocheting
Sole
Foundation: Make 12ch (chain) as Foundation Row.
Foundation: Make 12ch (chain) as Foundation Row.

R1: 12dc along the foundation chain. Additional 5dc into each end chain to make the rounded portion of the sole.
Note that you go round the foundation chain stitches to form both sides of the sole.
Note that you go round the foundation chain stitches to form both sides of the sole.

R2: 12dc along the straight portion. (2dc into one stitch) x5 for the rounded portion ==> 44 stitches

R3 (optional): Slip Stich around the whole sole.
This is optional but it does give the edges of the sole a firmer and nicer finish.

Body
Now we can go onto the body of the crochet baby shoes.
R1: dc all round. There are 2 beads per dc. You will now see why the sequence of the strung beads becomes important.

R2: dc all round. 1 bead per dc. Bead is at the top of the dc stitch.

Now we will begin to close up the front for the top of the baby shoes.
R3/Front: sl st (slip stitch) 6 stitches back. (Note: you can also cut yarn and then begin 6 stitches back but I prefer to slip stitch and it doesn’t make a difference to the final appearance).
R3/Front: sl st (slip stitch) 6 stitches back. (Note: you can also cut yarn and then begin 6 stitches back but I prefer to slip stitch and it doesn’t make a difference to the final appearance).

Then decrease by working (1dc into every other stitch)x11, including the pearl bead.


R4/Front: dc 11st together. Then slip stich down to the side (so we can begin making the back of the crochet baby shoes)


Now we can finish off the back of the baby shoes.
R3/Back: 23dc along the back. 1 bead per dc.
R3/Back: 23dc along the back. 1 bead per dc.

R4/Back: 23dc (no beads)

Strap
Time now to make the strap for the baby shoes.
Slip stich down the last row. Then make 10 chains (foundation chain for the strap).
Time now to make the strap for the baby shoes.
Slip stich down the last row. Then make 10 chains (foundation chain for the strap).


The Strap: (1dc + 1ch) along the chain stitches. Then join (slip stich) into top of R4 (of the back).
This is an adjustable strap – so that you can tighten/loosen around the ankle as needs be.


R5/Back: sc (single crochet) along the back. Work into the back (inner) loop of the previous row. This will produce a “line” on the RS (right side) of the work. Then cut yarn and finish the row.


After this, you can then add your desired buttons and other embellishments as you wish.
The Finished Crochet Baby Shoes


Credit
I learnt the basis of the technique used from a video (by Hanımeli Göz Nuruum) on Facebook (as per below. The link is: www.facebook.com/1004307769585052/videos/1220400021309158/I did make modifications (of course. Can't help myself!). And I did use a different beading technique which I found easier. But for anyone interested, the follow video is a great way to start.