This Artist Trio Blanket is based on the (partial) works of 3 inspirational artists: Paul Klee, Janet O’Neal, Wassily Kandinsky. At this stage (before the blanket is made), I don’t know if I will list the resultant graph (aka graphan) for sale. If it all works out ok, I probably will just in case someone wants to give this a try too.


Size: Lap Blanket/Throw Blanket
BlanketHere, I am deciding to go for a Lap Blanket aka Throw Blanket. There is no definitive, specific size so for simplicity, I am using the sizing from this chart in Blanket Sizes Info.Lap/Throw Blanket (planned size): 132×152 cm (52×60 inch) ==> 77×89 sq (using gauge below). That was the planned size – but as with life, it does not always work out exactly as planned. But as with life, it will still work out. 😀
Materials
Crochet Terminology (when used): US & pictorial crochet symbolsYarn: a selection of DK (Double Knit) yarns (Painbox Simply DK, Stylecraft DK Special, misc. )
Manufacturer’s Recommended Needle Size: 4mm
No. of Colours: 23
Hook: 3mm (note: smaller than the recommended size)
Crochet Stitch: No-Hole C2C (aka, holeless C2C, or Linked Corner to Corner)
Graph sizes (in squares): Right 27×89 sq / Middle 23×89 sq / Left 27×89 sq
Final Size: 125 x 139 cm (note: size is different from indented, due in part to variety of yarns used)
Final Nett Wt: 1.4kg (approx)
Work Time (excl. prep & graphing): approx. 144hrs/ 18 days
Gauge (Very Approimate)
[12×12 cm] = [7×7 sq] or [10×10 cm] = [5.8 sq]For this project, the gauge will be very approximate indeed. This is because I intend to use yarns from different brands and while they are supposedly DK, they still tend to vary in thickness.
Artist Trio Lap Blanket – Work Process
Creative/Work/Thought Process – Initial Ideas
I am always enchanted by colours and shapes. And as a consequence, I often have a strong urge to work in lots of colourful yarn .. or beads. When the urge to start work is strong, it is very hard and frustrating even to have to go looking for original inspirations. That process can take hours, days, weeks. Sometimes, nothing seems quite right. Sometimes, everything is tempting and choosing just one becomes impossible.
Ideas: I try to find ideas/shapes/colours/drawings/anything. Pinterest is a great help but it still takes hours. This took 12+ hours./
Here, I think I have now decided on the “final” look – a combo of 3 panels.
At this stage, I don’t yet know if the borders will be gray or black. Might depend on my eyes, yarn availability, & how the work is shaping up.
My initial idea is to work the blanket in 3 separate panels. Then combine them later. Why? First, just for the experience. Second, I think it will make the colour work for the linked C2C crochet work much easier to handle (both in weight and colour management).
After having a firm tentative for the visuals, I normally have to devote day(s) of long grinding work to translate images into graphs. Using ….
• what yarns (colours and yarn weights) I have on hand
• working out the gauge
WIP Photos
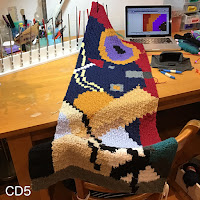
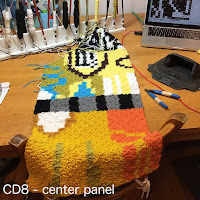
This gallery is mainly just a record of my WIP (work in progress) as the pieces develop. “CD” stands for “Crochet Day” and it indicates the n-th day of crochet (which excludes the days of planning and making the graph).
Finishing Artist Trio Crochet Blanket
1) Neaten Edges of Panels
Row of sc. [3sc+2sc] for every 2 LC2C (linked C2C)
Work one row of sc (single crochet) around each panel. Neatens and makes the next step of joining easier.
Change colours, corresponding to colours on the edge.
2) Join Panels
I used LHDC (Linked hdc) crochet join as the crochet joining method. It produces a join that is wider than the normal sc joins while still remaining firm, sturdy, and flexible.
3) Border – A Cushy, Double Layered Border
I made a double layered, cushy crochet border (how to) – something I felt was more in keeping with the blanket’s feel and texture.
A note on the Linked C2C Crochet Stitch Used
You can see why I also call this the NoHole C2C crochet stitch. Even with me stretching the crochet fabric, there are no gaping holes (unlike the standard Corner to Corner work which produces unsightly and undesirable holes, especially with usage). You can read more about how to work my Linked C2C crochet stitch.

PATTERN NOW AVAILABLE
Please note that the pattern is not a tutorial on how to LC2C (Linked Corner to Corner crochet). The listed pattern will consist of:- C2C graphs, with diagonal lines and colour count indicators (at 300dpi; suitable for print outs)
- written colour count for C2C work
- explanatory notes for how to best use the graphs and written colour count
- useful links to other optional how-tos if you want them


